You can tell when a flat was "cleaned" after renovation by someone who started with the mop. Give it one sunny afternoon and the truth comes back. There is a pale film on the floor again, the skirting feels dusty, and the top edge of the door turns your fingertip grey. I have seen this in Prague rentals, family flats in Vršovice, and brand new units waiting for handover in Karlín. The pattern is always the same. The mess was treated like normal household dirt, but post renovation cleaning is a different job.
If you are dealing with construction dust cleanup after painting, sanding, new flooring, or a bigger rebuild, the real win is not speed. It is order. Get the sequence right and the flat settles down faster. Get it wrong and you spend the next week wiping the same white dust off the same black shelf. That is why final cleaning after renovation should be planned in two layers: a rough removal stage and a careful finishing stage.
Why fine dust is the biggest problem after renovation
The obvious mess is rarely the hard part. Cardboard, masking foil, empty tubes, grout scraps, cuttings from plasterboard, plastic covers. Annoying, sure, but straightforward. Fine dust is what drags the whole thing out. It lands high up on walls, sits on top of frames, hides inside radiator fins, settles into fabrics, and somehow shows up inside cupboards that were closed the whole time.
I remember one flat near Jiřího z Poděbrad after wall sanding. It looked nearly done. Floors vacuumed, counters wiped, windows open. Nice. Then I touched the top of the bedroom door and my finger came away white. Same story inside a built-in wardrobe. That is the trap with post renovation cleaning. Dust keeps travelling long after the loud part of the work is over.
One quick vacuum almost never solves it. Fine particles lift again with every step, every draft from a tilted window, every warm radiator. In a panelák, where rooms are compact and air moves quickly once you start opening doors, that dust gets redistributed fast. In a new build with smooth black fittings and pale floors, you simply notice it more.
There is also a health angle. If somebody at home has allergies, asthma, or just sensitive breathing, loose dust in the air is not a minor detail. The other problem is surface damage. Fresh vinyl, matte kitchen fronts, glass, new bathroom fittings, lacquered joinery. They all look sturdy right after installation. Still, if you rub gritty dust across them with pressure, the cleanup itself can leave marks.
The right order for post renovation cleaning
This is where people lose patience. The floor looks worst, so they start there. I get why. It feels satisfying for about ten minutes. Then more dust drops from the sill, the frame, the top of the wardrobe, the cable rail, the light fitting. Back to square one.
1. Remove waste and heavy debris first
Start by clearing everything that no longer belongs in the flat. Protective paper, foil, tape, cardboard, empty cartridges, paint trays, plaster bits, drilling debris, leftover fixings. Until that stuff is gone, detailed cleaning is mostly fake progress.
I usually treat this part like site clearing, not cleaning. Strong bags. Gloves. One dry cloth for handprints and rough dust on hard surfaces. One barely damp cloth for local smears. Nothing fancy yet. The goal is simple: open the space so the real construction dust cleanup can happen without obstacles.
If trades are still coming back for small fixes, do not jump too early into the final cleaning after renovation. Wait until the cutting, drilling, silicone work, and touch-up sanding are actually finished. Otherwise you clean twice, and not in the useful way.
2. Dry dust removal from top to bottom
Only now does the important part start. Always top to bottom. High edges first, then frames, rails, cabinet tops, shelves, sills, skirting, and finally the floor. It sounds obvious. People still do it the other way around because the floor is right there in front of them.
Filtration matters more than people think. After a bigger job, an ordinary domestic vacuum often starts strong and fades fast. Filters clog, suction drops, and some of the finest dust goes back into the room. That is one of the moments when new build cleaning or larger post renovation cleaning starts to make sense as a professional job. An industrial vacuum with proper filtration is not a luxury toy here. It changes the result.
After vacuuming, wipe with microfiber cloths. Rinse them often. Keep them only lightly damp. If the cloth is soaked, you start pushing a chalky film around instead of lifting it off. On frames and trim, a few gentle passes work better than one heroic wet swipe.
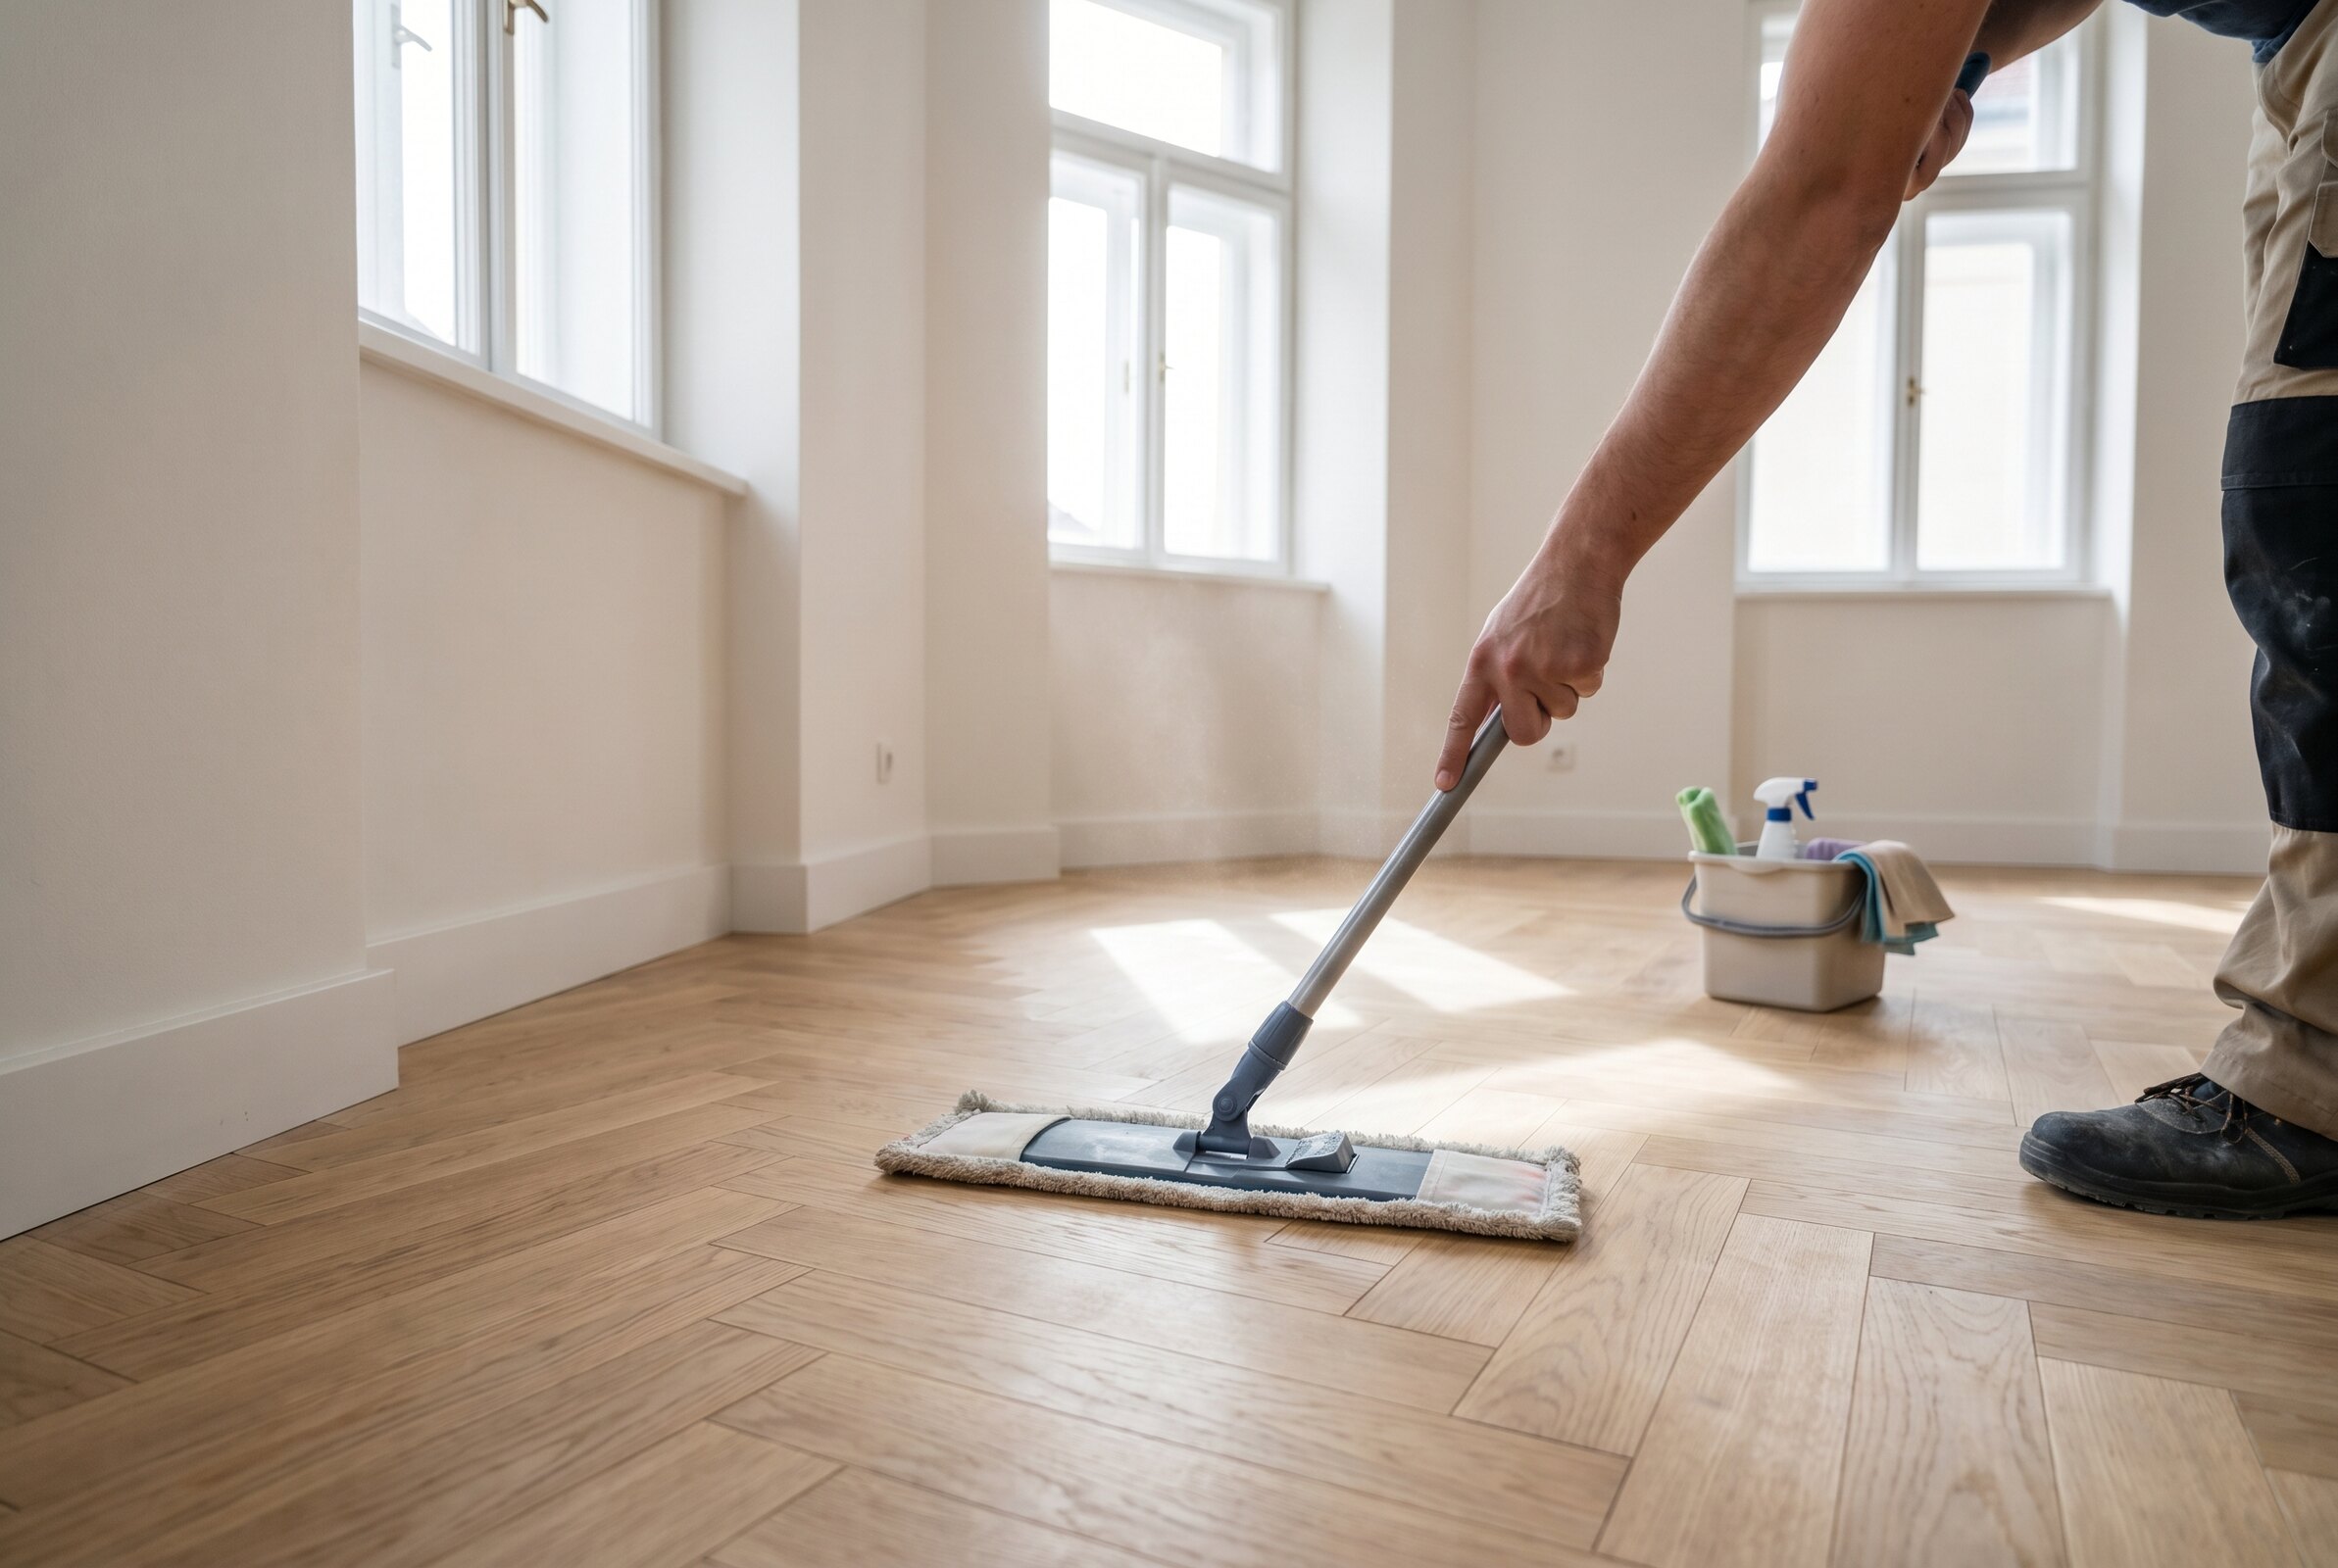
3. Wet finishing and detail work at the end
Leave mopping and final polishing until the dry dust stage is honestly done. Not mostly done. Done enough that your cloth is not coming back white after every pass.
Vacuum corners, joints, and edges first. Then mop according to the surface. Timber and vinyl need a restrained hand. Tiles can take more, but grout lines still punish sloppy work. After that, do the detail round: switches, sockets, handles, taps, mirrors, inside drawer edges, lower shelf surfaces, and the tracks where dust likes to hide.
When people ask me about cleaning after painting without streaks, my answer is boring but true. Use less water, change cloths sooner than you think, and do not rush the order.
How to clean different surfaces without damaging them
This is the part where expensive mistakes happen. The urge to scrub is strong after renovation. Resist it.
New floors and grout lines
With wood or vinyl, dry removal comes first and patience comes second. Vacuum with a soft attachment. Then use a lightly damp mop, not a soaked one. If you spot paint or sealant, stop before you start scraping. Figure out what the mark actually is. A metal blade on a new floor is the kind of shortcut people regret immediately.
Tiles and grout create a different headache. If dust gets wet, dries, then gets wet again, it settles deeper and the floor starts looking tired before anyone has even moved in. In practice, that means several lighter passes usually beat one aggressive wash. Not glamorous, but it works.
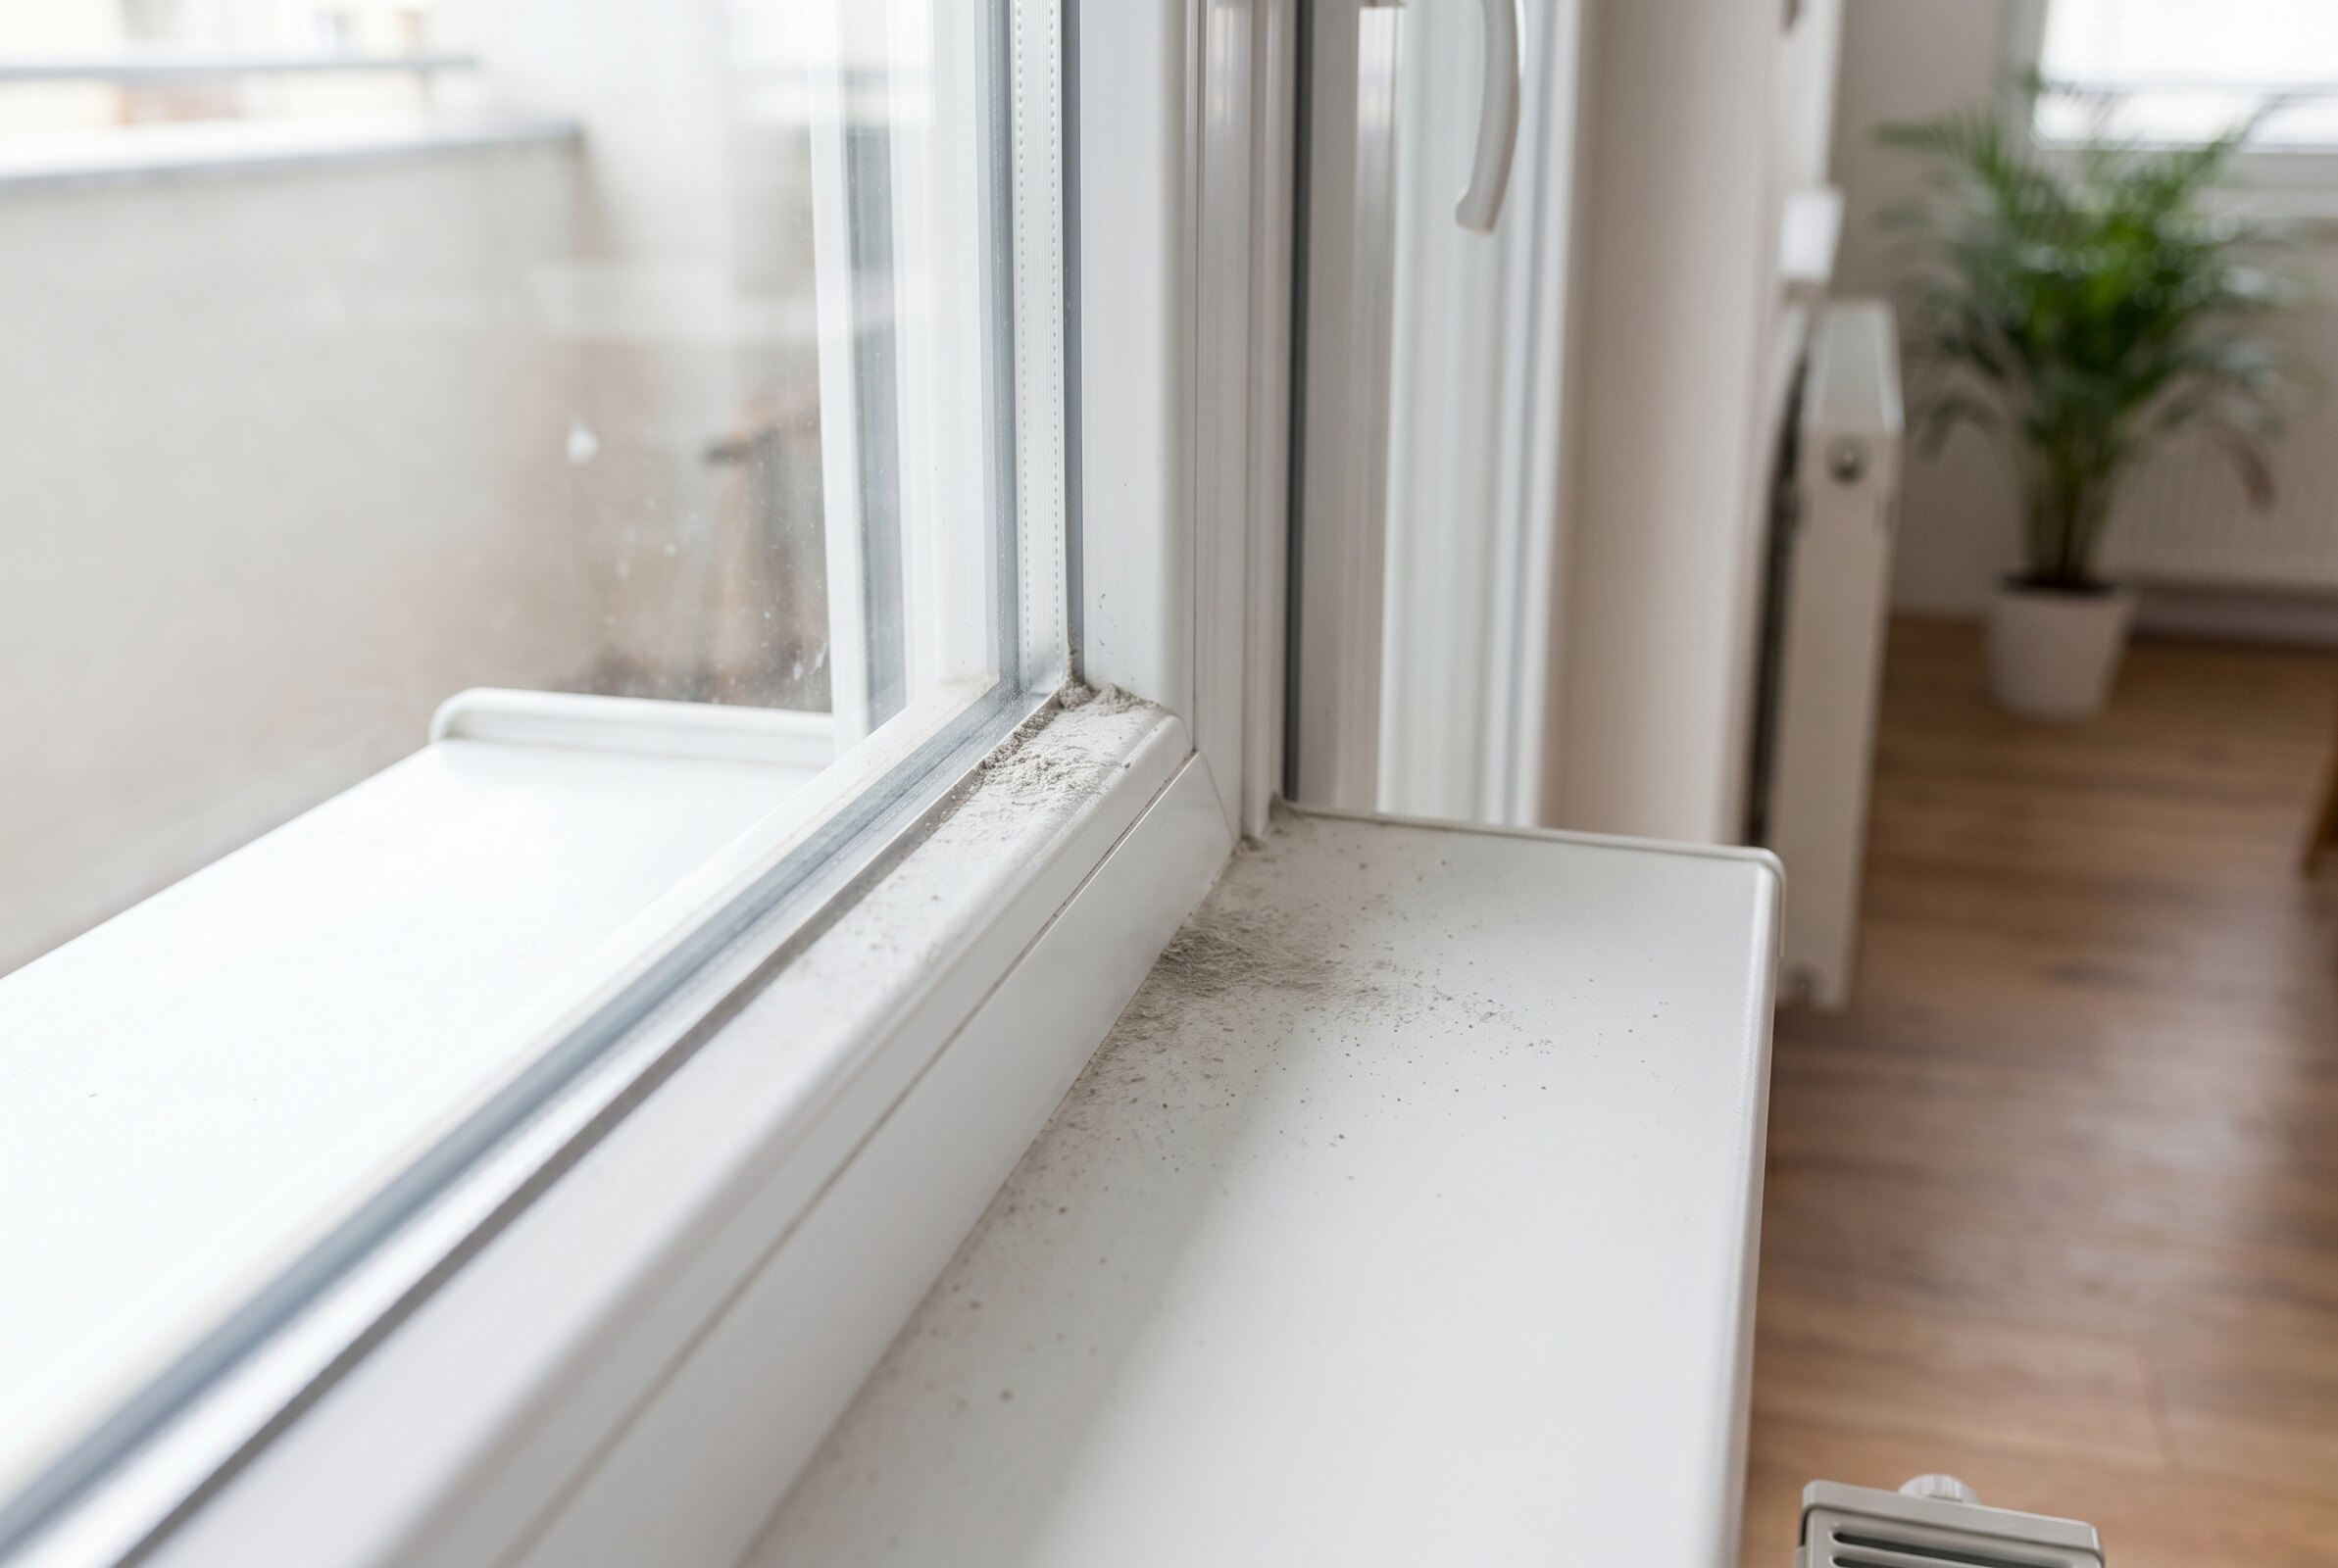
Windows, frames, and sills
Windows are deceptive after renovation. From the middle of the room they can look fine. Up close, the tracks still hold dust, the seals catch plaster residue, and the glass has that dull film you only notice from an angle.
Work in layers. Vacuum the tracks first. Wipe the frames second. Clean the glass last. If you go at the glass first, you often drag grit across it and create more work for yourself.
Textured or matte sills deserve extra patience. Dust clings to them longer than people expect. You wipe once, think it is over, come back after lunch, and there it is again. That delayed dust fall is normal. It does not mean you failed. It means the flat still needs one more pass.
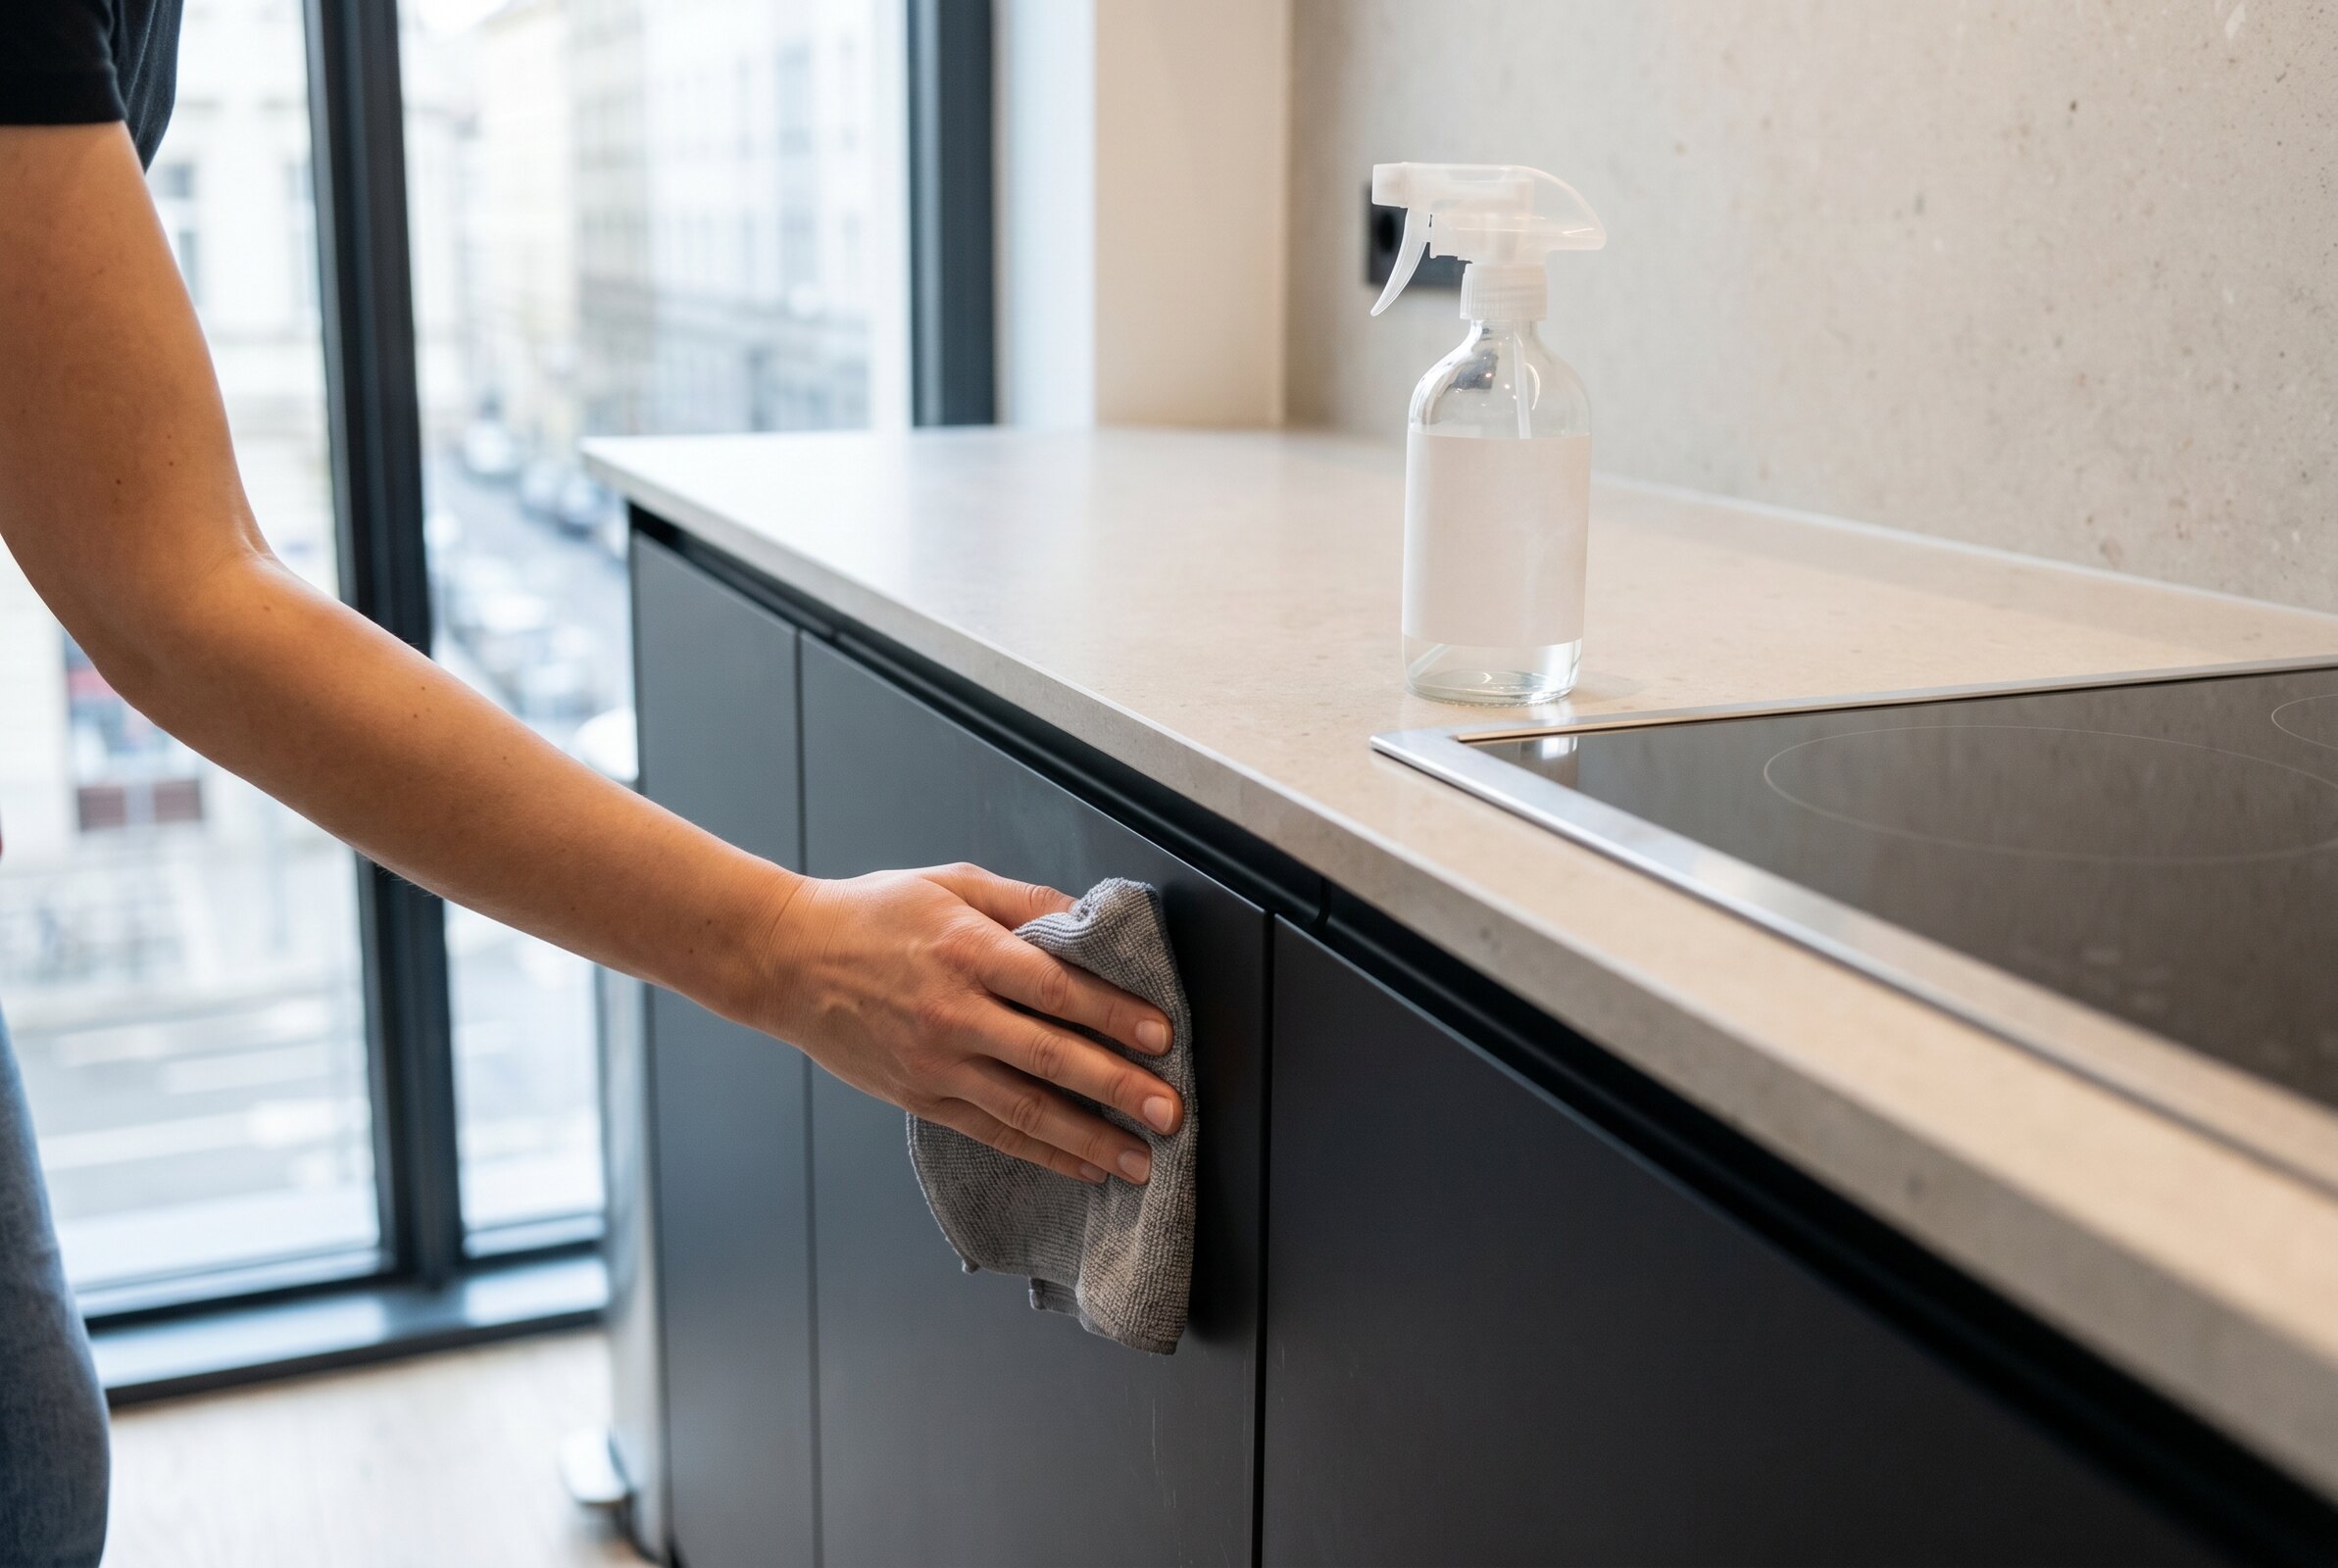
Bathroom fittings, kitchens, and built-ins
Bathrooms often carry the weird leftovers: grout haze, silicone smears, water marks, dried drips from trades rinsing tools. Matte black taps and coated fittings need a gentle hand. Strong acidic cleaners or abrasive pads are a bad gamble.
In kitchens, vacuum the top edges of cabinets, plinths, drawer runners, and appliance gaps before the room goes into normal use. That step gets skipped all the time. Then the first week of living there becomes a slow discovery of hidden dust.
Built-in wardrobes are the same story. Clean inside them even if they were empty and closed. Dust does not respect cabinet doors.
What people most often underestimate after renovation
Vent grilles. Radiators. Top edges of doors. Cable covers. The upper side of a wardrobe that no one can see without a chair. Those are the classics.
The second blind spot is the inside of drawers and cupboards. People assume closed means protected. I wish. Fine dust moves with airflow, footsteps, and repeated visits from trades carrying tools in and out.
Then there is the delayed return of dust over the next few days. This matters enough that I always mention it plainly. A bigger renovation usually needs one main clean and one shorter follow-up clean two to four days later. Especially if lights are still being fitted, silicone is curing, or a carpenter is coming back to adjust doors.
Textiles get forgotten too. Curtains, upholstered chairs, mattresses, headboards. If they stayed in the flat during the works, they probably need vacuuming at minimum. Sometimes washing. Sometimes deeper cleaning.
When it makes sense to book professional help
Not every post renovation cleaning job needs a team. If you painted one room, covered things properly, and dust stayed contained, you can probably handle it yourself. A whole flat, a house, or a messy job after several trades is different.
The classic pressure point is move-in timing. Keys on Friday, movers on Saturday, and the flat still has dust in the grout, haze on the glass, and residue on the frames. That is when DIY stops being economical. The same goes for rental handover. Missed details are visible instantly.
Professional final cleaning after renovation also makes sense when the dirt is not just dust. Paint specks, silicone residue, cement haze, adhesive traces, heavy grime after workers. Or when the flat has surfaces you do not want to gamble with: premium kitchen fronts, solid wood floors, large glazed walls, darker fittings that show every wipe mark.
If you need help in Prague, ČistýKout can connect you with vetted cleaners for post renovation cleaning, construction dust cleanup, or pre-handover cleaning. You can send a non-binding request through the contact page and decide what is still worth doing yourself and what is smarter to hand over.
The short version is simple. Do not start with the mop. Clear the waste, remove dust from the top down, treat each surface according to its material, and leave the wet finish for the end. That is how post renovation cleaning actually ends instead of hanging around your flat for another week.